You have probably looked at your nails and wondered which shape would actually suit your hands. Maybe you have tried a few and they never looked quite right. Or you have seen a shape you love on someone else but it did not translate to your own fingers.
The issue is not the shape. It is that most guides skip the step that matters most: teaching you how to read your own hands.
The best nail shape for your hands depends on three things: the proportions of your palm and fingers, the width of your nail bed, and the current strength of your nails. Most people have never thought about their hands this way. Once you do, the shape that flatters you becomes obvious.
Here is the short version. Oval and almond shapes flatter shorter fingers and wider palms by creating a visual taper. Square shapes suit long fingers and narrow nail beds. Squoval works for almost everyone. But the real value is in understanding why, so you can make confident choices every time you pick up a file.
This guide walks you through a 30-second hand assessment, explains the reasoning behind each shape recommendation, teaches you how to file each shape at home, and covers what to do if your nails are not strong enough to hold the shape you want yet.
How to assess your hands (the part most guides skip)
Most nail shape guides give you a list of shapes and tell you to pick one. That is like choosing glasses without knowing your face shape. The reason so many people feel unsure about their nails is that nobody has taught them how to actually look at their hands.
You are going to assess three things: your palm shape, your finger length, and your nail bed width. Each one affects how a nail shape looks on you. Together, they narrow your options down to the two or three shapes that will genuinely flatter your hands.
This takes about 30 seconds. Hold your dominant hand in front of you, palm facing you, and work through each step.
Step 1: Palm shape
Look at the palm of your dominant hand. How would you describe its shape?
- Narrow and long (your palm is noticeably longer than it is wide)
- Square or wide (the width of your palm is close to the length)
- Petite and compact (your hand is small overall)
Your palm shape sets the canvas. It determines the overall proportions that your nail shape needs to work with. Wider palms tend to look more balanced with softer, tapered nail shapes because the taper offsets the width. Narrow palms have more flexibility because most shapes sit well on them without competing with the proportions.
Step 2: Finger length
Now look at your fingers relative to your palm. How would you describe their length?
- Short (fingers are noticeably shorter than the palm)
- Medium (fingers and palm are roughly proportional)
- Long (fingers are clearly longer than the palm)
Finger length determines how much visual elongation you need from your nail shape. This is the single biggest factor in whether a shape flatters you or fights you. Shorter fingers benefit from shapes that taper and draw the eye outward, creating the illusion of extra length. Longer fingers can handle blunt, structured shapes without looking disproportionate, and they have the real estate to carry off more dramatic styles.
Step 3: Nail bed width
This is the detail most guides miss entirely, and it matters as much as finger length.
Looking at one of your fingernails straight on, how would you describe the width of your nail bed?
- Narrow (the nail bed is clearly narrower than the fingertip)
- Average (the nail bed roughly matches the fingertip width)
- Wide (the nail bed extends close to the edges of the fingertip)
Your nail bed width affects how every shape looks on you. Wide nail beds can appear even wider with square or squoval shapes because the straight edge emphasises the full width. Tapered shapes like oval and almond narrow the visual width and create a slimmer silhouette. Narrow nail beds, on the other hand, look naturally elegant in most shapes and can handle wider styles like square without looking out of proportion.
What your assessment means: matching shape to hand
Now that you know your palm shape, finger length, and nail bed width, here is how they combine. Rather than four rigid hand-type boxes, think of this as a set of principles that stack together.
If you have shorter fingers
Your primary goal is visual elongation. Shapes that taper toward the tip draw the eye outward and make the finger appear longer.
Best shapes: Oval, almond. Why: The taper creates a lengthening line from the cuticle to the tip. Oval does this gently. Almond does it more dramatically. Both work well regardless of palm width.
Also works: Round (still narrows the tip compared to your natural nail edge), squoval (if you want something lower-maintenance).
Avoid: Short square. The blunt horizontal edge emphasises exactly where the finger ends, which can make shorter fingers look stubbier. If you love the square aesthetic, try squoval instead. You get the straight-edge feel without the visual cut-off.
If you have longer fingers
You have more flexibility. Longer fingers can carry blunt, structured shapes without looking disproportionate. They also give you the length to pull off more dramatic styles.
Best shapes: Square, coffin, squoval. Why: Square adds width and visual weight, which balances the length. Coffin gives you a fashion-forward taper with a flat tip that adds structure. Squoval works if you want the square aesthetic with slightly softer edges.
Also works: Almond and oval look elegant on long fingers. They will elongate further, which is a choice rather than a problem if you like that look.
Avoid: Very long stiletto shapes if your palm is narrow. The extreme point can make already-long fingers look even more elongated. On wider palms, stiletto works better because the palm width anchors the visual weight.
If you have wide nail beds
Your primary goal is narrowing the visual width of the nail.
Best shapes: Almond, oval. Why: The tapered sides draw the eye inward and create a slimmer silhouette. The nail appears narrower than it actually is.
Also works: Round (the curve narrows the visual edge compared to a flat-filed nail).
Avoid: Square. The straight horizontal edge mirrors the full width of the nail bed and can make it look even wider. If you want a structured shape, try coffin. The taper narrows the sides before squaring off the tip, so it gives you an angular look without emphasising width.
If you have narrow nail beds
Most shapes look naturally proportionate on narrow nail beds. You have the most flexibility of any nail bed type.
Best shapes: Square, squoval, coffin. These add visual width and presence to a naturally narrow nail.
Also works: Almond and oval look refined and elegant. They will not widen the nail, but they will not need to.
Avoid: Nothing in particular. Narrow nail beds are the most forgiving canvas for experimentation.
Putting it together
Your ideal shape sits at the intersection of these factors. A few examples:
- Short fingers + wide nail beds: Almond or oval. You need the taper for both elongation and visual narrowing.
- Short fingers + narrow nail beds: Oval or squoval. You need the elongation but do not need to narrow the nail.
- Long fingers + wide nail beds: Coffin or almond. The length gives you range, and the taper handles the width.
- Long fingers + narrow nail beds: Square, squoval, or coffin. You have full flexibility. Pick based on style preference and maintenance appetite.
- Petite hands overall: Oval or round. These keep proportions balanced on a smaller canvas without overwhelming the hand.
Two more factors: lifestyle and nail strength
Your hand proportions narrow down which shapes flatter you. These next two factors narrow down which shapes are practical for you.
Your daily activities
Shape durability matters more than most guides acknowledge. Square corners catch and snag on fabric, pockets, and hair. Pointed tips are vulnerable during physical tasks. Round and squoval hold up best under daily wear.
- Hands-on work (physical tasks, cooking, sport, gardening): Round or squoval. These shapes stay intact. A dramatic shape that chips within days is not worth the filing time.
- Keyboard-heavy (typing, office work, screen time): Squoval, oval, or almond. Shorter versions of any of these work well. Avoid very long shapes if you type all day.
- Mixed lifestyle: Squoval is the safest bet. It handles everything.
- Low impact on nails: You have full freedom. File whatever shape your hand proportions suit best.
Your style preference
This is the finishing layer. Your hand proportions and lifestyle narrow down what works. Your style preference picks the winner from the shortlist.
- Clean and natural: Round or oval. Understated, effortless, no fuss.
- Polished and classic: Squoval or oval. Put-together without trying too hard.
- Bold and modern: Almond, coffin, or square. Statement-making but still wearable.
- I just want healthy nails: Start with round or squoval. Focus on strength and hydration first. Shape can come later.
Nail shapes at a glance

How to file each nail shape at home
Good filing technique matters more than the shape you choose. Done wrong, filing creates micro-tears in the nail layers that lead to peeling and splitting. Done right, it strengthens the edge and gives you a clean, lasting shape.
The rules that apply to every shape:
- Start with dry, clean nails. Dry nails resist the file cleanly. Wet nails are more likely to tear.
- Use a glass file or a fine-grit file (240 grit or higher) for natural nails. Coarse files are for acrylics.
- File in one direction only. Start at the outer edge, stroke gently toward the centre, then lift the file completely off the nail before the next stroke. Never saw back and forth.
- Use light pressure. Let the file do the work.
- Trim excess length with clippers first, then refine the shape with the file.
- Finish with cuticle oil to nourish the nail and surrounding skin.
Filing round nails
File the side walls straight, following the natural line of the nail. Then gently round the free edge, following the curve of your fingertip. Use smooth, continuous strokes. Check both hands frequently to keep the shape even.
Filing oval nails
File the sides in from the edge toward the centre, tapering slightly. Round the free edge into a smooth, egg-like curve. The tip should be narrower than the widest point of the nail but not pointed. Think of mirroring the curve of your cuticle at the base.
Filing squoval nails
File straight across the free edge first, as if creating a square. Then gently round the two corners in one short stroke on each side. The result is a straight edge with softened corners. Flip your hands toward you to check symmetry.
Filing square nails
File straight across the free edge, keeping the file perpendicular to the nail. File each side wall straight and even. The corners should be clean but not sharp enough to snag. A single light stroke across each corner takes the sharpest point off without losing the square shape.
Filing almond nails
File each side of the nail at an angle, tapering inward from the widest point of the nail toward a central peak. The two sides should meet in a softly rounded point, not a sharp tip. Check from above and from the side to make sure the taper is even. This shape needs at least 3-4mm of free edge to look defined.
Filing coffin (ballerina) nails
Start with the almond technique: taper both sides inward from the widest point. Once you have the taper, file the tip straight across to create a flat edge. The result is a tapered body with a squared-off tip. This shape needs length and strong nails to hold.
What if your nails are short?
Short nails look polished and put together in the right shape. Round, oval, and squoval all work at shorter lengths.
If your nails are short because they break before they grow, that is a strength issue, not a shape issue. Weak, dehydrated nails split and peel at the free edge, which means they never reach the length you need to file into your preferred shape.
Building nail strength is step one. A hydrating serum that absorbs into the nail plate, followed by a protective oil that locks in that hydration, helps minimise splitting and supports healthier growth over time.
Once your nails can hold 2-3mm of free edge without breaking, you have enough to start shaping.
What if your nails are weak or recovering?
If you are coming off gels, SNS, or acrylics, your nail plate is probably thinner and more prone to peeling than usual. That is normal. The layers of keratin need time to grow out and recover.
During recovery, stick to round or squoval. These shapes distribute stress evenly across the nail tip and are the least likely to catch or snag. Avoid pointed shapes until your nails feel resilient enough to hold them.
A daily nail care routine supports the recovery process. Apply a nail serum to clean, dry nails. Follow it with an oil to seal in hydration. Massage both into the nail and cuticle area. That small daily step compounds into visible improvement within 4 to 6 weeks for most people.
Nail strength and shape: why they are connected
The shape you want and the shape your nails can hold are not always the same thing.
Pointed shapes like almond and stiletto concentrate stress at the narrow tip. If the nail plate is dehydrated or weakened, that tip is where it will break first. Broader shapes like round, squoval, and square spread the load more evenly, which makes them more durable.
This is not about limiting yourself. It is about starting where your nails are and working toward where you want to be. Strong, hydrated nails can hold almost any shape. Weak nails need a foundation first.
Think of it as building fitness. You do not run a marathon on day one. You build up to it. The same applies to nail shape. Start with round or squoval. Build strength with a consistent hydrating routine. Graduate to almond or coffin as your nails grow stronger.
How to maintain your nail shape
File every 7 to 10 days to keep the shape defined. Growth pushes the free edge out unevenly, so regular filing keeps things tidy.
Apply cuticle oil daily. Hydrated cuticles frame the nail bed and give the overall shape a cleaner, more polished appearance. An oil pen is practical for daily use, especially when you are out of the house.
Wear gloves for washing up, cleaning, and gardening. Water exposure and household chemicals are the two biggest causes of nail dehydration and weakening.
If a nail breaks, file it down to match the others rather than leaving one uneven. Consistency across all ten nails looks more intentional than one long nail alongside nine short ones.
Frequently asked questions
Q: What nail shape makes fingers look longer?
A: Oval and almond shapes create a visual taper that draws the eye along the finger, making it appear longer and more slender. Both work well on shorter fingers and wider palms. If your nails are too short to file into an almond, start with oval and graduate as they grow.
Q: What is the most flattering nail shape for everyone?
Squoval suits the widest range of hand types. It combines the straight edge of a square with softly rounded corners, giving a polished look without emphasising width. Almond is a close second, particularly if you have a few millimetres of free edge to work with.
Q: Can you shape short nails?
Yes. Round, oval, and squoval all work on shorter nails. Even a millimetre or two of free edge past the fingertip gives you enough to create a clean shape. Avoid almond, coffin, or stiletto on very short nails. These shapes need length to form the taper.
Q: What nail shape is best for weak or damaged nails?
Round and squoval. These shapes distribute stress evenly across the nail tip and are less likely to catch or snag. Pointed shapes concentrate pressure at the centre, which can cause splitting in nails that are already compromised. Build strength with a hydrating nail care routine first, then move to more tapered shapes when your nails can hold them.
Q: How often should you file your nails to maintain shape?
Every 7 to 10 days for most people. Always file on dry nails using a glass file or fine-grit file (240 grit or higher for natural nails). File in one direction only, from the outer edge toward the centre. Sawing back and forth creates micro-tears in the nail layers that lead to peeling and splitting.
The right shape starts with strong nails
You can learn every filing technique in this guide, but if your nails are too weak to hold the shape, it will not last. Nail strength is the foundation that everything else is built on.
The good news is that building strength is simple. A consistent daily routine of serum and oil, applied to clean nails, hydrates the nail plate and minimises the splitting and peeling that stop nails from growing to a shapeable length.
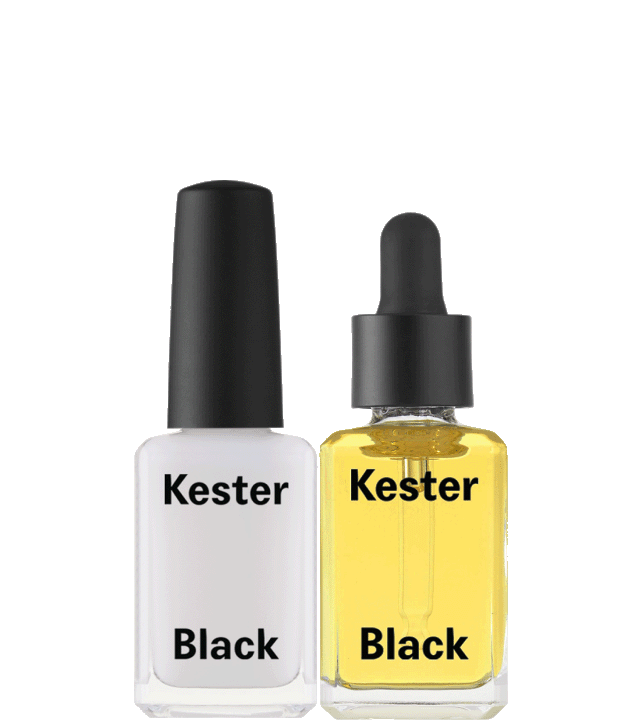
The Nail Rescue System is a two-step routine designed for nails that are damaged, peeling, or recovering from salon treatments.
If you are not sure which system suits your nails, take the nail concern quiz to get a personalised recommendation.
Quick recap
- Identify your hand type: palm shape, finger length, nail bed width.
- Match it to a flattering nail shape using the guide above.
- Check your nail strength. If nails break before they grow, address that first.
- File with the right technique: dry nails, glass file, one direction only.
- Maintain the shape with regular filing and daily cuticle oil.